Valentine’s Day is just around the corner, and if you’re like many of us, your excitement for this special day is bubbling up. This time of year always reminds me of hearts, flowers, and the joy of celebrating love in all its forms. But let’s be honest—it’s also about looking fabulous, and what better way to express your style than through stunning Valentine’s Day nail designs? Whether you’re planning a romantic dinner, a fun gathering with friends, or simply want to feel special, your nails can truly steal the show.
If you’re someone who loves nail art and enjoys exploring trendy, gorgeous designs, this post is just for you. I’ve gathered 30 jaw-dropping Valentine’s Day nail designs that will elevate your look and make a statement. Each design has its own flair, allowing you to express your unique personality and style. From sweet pastels to bold hues, I promise you’ll find something that captures your heart and makes your nails the talk of the town.
Get ready to dive into a world of color, creativity, and inspiration! You’ll discover a variety of nail art techniques and styles that suit any mood or occasion. Each design is not only visually stunning but also easy to recreate, ensuring you’ll be able to flaunt your love-themed nails with confidence this Valentine’s Day.
Key Takeaways
– Explore a variety of 30 Valentine’s Day nail designs that cater to different styles and preferences, from chic to whimsical.
– Learn about trendy techniques like ombre, glitter gradients, and floral patterns that can elevate your nail game.
– Each design offers a unique twist, letting you express your personality and mood for the occasion.
– Follow practical tips on how to recreate these nail looks at home, making it accessible for everyone.
– Discover the perfect nail art for your Valentine’s Day plans, ensuring you feel fabulous and festive all day long.
1. Sweetheart Ombre

Kick off your Valentine’s Day nail artistry with a charming ombre effect! This design seamlessly blends soft pink and white shades, mimicking the sweet hues of cotton candy. It strikes the right balance of romantic and playful, making it ideal for both intimate dates and casual outings with friends.
To create this dreamy look, start with a base coat of white polish. After it dries, use a makeup sponge to dab on a gentle pink polish, blending it softly into the white tips. Finish with a glossy top coat for a stunning shine.
Outfit Pieces:
– White nail polish (base coat)
– Soft pink polish (for the ombre effect)
– Glossy top coat (for a shiny finish)
Styling Tips:
– Opt for pastel shades for a delicate look or go vibrant for a bolder impact.
– Add a sprinkle of holographic glitter at the tips for extra sparkle!
– This ombre design is versatile enough to fit any occasion, ensuring you always look stylish.
Perfect for romantic evenings, casual meet-ups, or festive celebrations. You can easily switch up the pink for a red or purple for a fresh twist!
Sweetheart Ombre
Editor’s Choice

SAVILAND 6pcs Ombre Nail Polish Sets: Charm Pink Blue Gold Purple Pearl …

Morovan Fingernail Nail Polish Set: Hot Pink Nail Polish Kit Air Quick D…

Beetles Extra Glossy No Wipe Gel Top Coat, 2 Pcs 15ml Super Shiny Clear …
2. Love Notes

If you’re a romantic at heart, the Love Notes design is your perfect match. This nail art features delicate letters and love symbols painted on a soft pink or nude base, offering an understated elegance that speaks volumes without being over the top.
Begin with a smooth base coat, then, once dry, use a fine brush or nail art pen to craft tiny hearts, arrows, and sweet notes on your nails. Personalize it by writing initials or little phrases that remind you of your special someone.
Outfit Pieces:
– Nude or pale pink polish (for the base)
– Fine brush or nail art pen (for details)
– Top coat (to seal the design)
Styling Tips:
– Consider metallic shades for your letters to add a shimmering touch.
– This design captures love’s essence while allowing your unique personality to shine through!
Perfect for anniversaries, special dates, or any day you want to celebrate love. It’s a timeless style that can be customized for any occasion.
Love Notes
Editor’s Choice

Artdone Nail Dotting Tools 32PCS Double-ended Nail Art Brushes Kit Nail …

15pcs Nail Art Stamp Pen Set for Women, including Flower Stamp Pen, Stam…

Sally Hansen Double Duty™, Base and Top Coat, Quick Dry, Long Lasting,…
3. Heart-Patterned Delight

Celebrate love with playful heart patterns! This design features an array of hearts in vibrant colors, creating a whimsical look perfect for any Valentine’s Day celebration.
Choose your favorite colors like red, pink, and white to bring this design to life. Start with a solid base color, and once it dries, use a dotting tool to create hearts in various sizes across your nails. For a fun twist, alternate colors or add glitter accents for a sparkling effect.
Outfit Pieces:
– Solid base color nail polish (your choice)
– Dotting tool (for heart shapes)
– Glitter polish (optional for sparkle)
Styling Tips:
– Each nail can showcase different patterns and colors for a playful twist!
– This design is not only fun but also allows for creativity and personalization, perfect for those who love DIY projects.
Ideal for parties, casual dates, or any festive gathering. You can customize the heart colors to match your outfit, making it a versatile choice!
Heart-Patterned Delight
Editor’s Choice

Morovan Rose Nail Polish Set: Fall Burgundy Dark Wine Cherry Red Hot Pin…

JERCLITY 6 Sheets Airbrush Stencils Nail Stickers for Nail Art Self-Adhe…

5PCS Dotting Pens with 3 PCS Nail Painting Brushes, Nail Art Design Tools
4. Glittering Cupid’s Arrows

Add a sparkle to your Valentine’s Day with glittering Cupid’s arrows! This chic design combines a dark polish with glittery accents, creating a trendy and sophisticated look.
Start with a base coat of your chosen dark shade. Once it’s dry, use nail tape to outline arrow patterns and fill them in with glittery polish. The contrast between the dark base and shimmering details ensures this design stands out, perfect for catching eyes.
Outfit Pieces:
– Dark nail polish (black or deep red)
– Nail tape (for arrow shapes)
– Glitter polish (for filling)
– Top coat (to seal the design)
Styling Tips:
– Pair this nail art with your favorite evening outfit for a playful yet sophisticated touch.
– The mix of edgy and glamorous makes it suitable for romantic dinners or lively parties.
This design is perfect for special nights out or any festive celebration. You can switch the dark polish for a vibrant color if you want a more playful look!
Glittering Cupid’s Arrows
Editor’s Choice

Artdone 38Pcs Nail Striping Tape Lines Kit With Nail Art Pens Dotting To…

Manicure Set Professional Nail Clippers Kit Pedicure Care Tools- Stainle…
L.A. COLORS Color Craze Nail Polish, Glitter Bomb CNP543
5. Floral Fantasy

Nothing captures romance like a beautiful floral design. The Floral Fantasy nail art features delicate blossoms in soft pinks, whites, and greens, embodying the spirit of Valentine’s Day.
Start with a pastel base color like light pink or mint green. Use a fine brush to paint tiny flowers and leaves, allowing each bloom to shine on your nails. Tiny dots around the flowers can mimic pollen and add extra detail, bringing a fresh look that channels spring vibes.
Outfit Pieces:
– Pastel base color nail polish (light pink or mint green)
– Fine nail brush (for painting flowers)
– Top coat (for shine)
Styling Tips:
– Mixing various floral patterns can create a unique and personalized style.
– Consider adding a matte top coat for a modern twist on this classic design.
Perfect for romantic dinners, spring events, or any occasion where you want to express your love of nature. You can easily customize the flowers to match your outfit!
Floral Fantasy
Editor’s Choice
5PCS Dotting Pens with 3 PCS Nail Painting Brushes, Nail Art Design Tools

Eternal Pastel Nail Polish Sets for Women (CANDY PASTELS) – Pastel Nail …
Artdone Nail Dotting Tools 32PCS Double-ended Nail Art Brushes Kit Nail …
6. Whimsical Watercolors

Watercolor nail art brings a unique charm to your manicure with its soft, blended colors. This design features a dreamy watercolor effect that looks as if it’s been brushed on, making each set of nails a mini work of art.
Choose colors that embody Valentine’s spirit, like pink, red, and lavender. Begin with a clear or light base coat, then apply splotches of color with a small brush, blending them for that watercolor look. White highlights can add dimension and depth to the design.
Outfit Pieces:
– Clear or light base coat (for the base)
– Vibrant nail polishes (pink, red, lavender)
– Small brush (for applying color)
Styling Tips:
– Each nail can tell a different story with varied colors for a fun twist!
– This design is perfect for expressing creativity and individuality, making it truly special.
Ideal for art lovers, casual outings, or any creative celebration. You can adjust the colors to fit your mood or outfit!
Whimsical Watercolors
Editor’s Choice
Artdone Nail Dotting Tools 32PCS Double-ended Nail Art Brushes Kit Nail …

FANDAMEI Nail Art Brushes, Nail Art Kit with Nail Art Brush, Dotting Too…
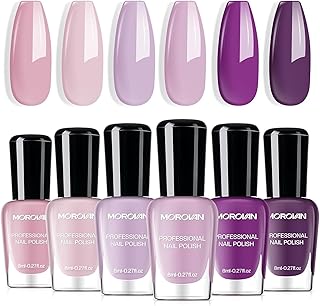
Morovan Nail Polish Set Fingernail: Lilac Light Purple Quick Dry Nail Po…
7. Chic Marble Effect

Marble nails are an elegant choice that exudes sophistication. This design mimics the look of real marble stone, making your nails a stylish accessory that stands out.
Start with a white or light-colored base coat. Using a thin brush or nail art tool, swirl in your chosen primary color (like grey or pink) to mimic the natural lines of marble. Finish with a glossy top coat to enhance the shine and polish of the design.
Outfit Pieces:
– White or light-colored polish (for the base)
– Secondary polish in grey or pink (for the marble effect)
– Top coat (for a shiny finish)
Styling Tips:
– Marble nail art pairs beautifully with any outfit, providing a chic look for both casual and formal settings.
– Keep your brush clean to avoid unwanted color blending for a perfect marble look.
Perfect for elegant occasions, date nights, or any event where you want to impress. You can play with colors to match your wardrobe!
Chic Marble Effect
Editor’s Choice
Sally Hansen Double Duty™, Base and Top Coat, Quick Dry, Long Lasting,…
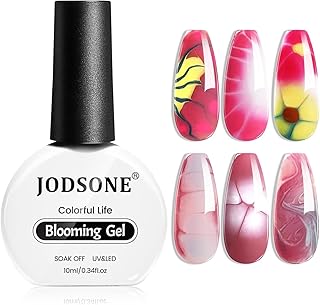
JODSONE 10ML Blooming Gel Nail Polish Clear Marble Nail Nail Art Accesso…
Artdone Nail Dotting Tools 32PCS Double-ended Nail Art Brushes Kit Nail …
8. Modern Geometric

Geometric nail art adds a contemporary edge to your Valentine’s Day look! This trendy design is about sharp lines and bold shapes combined with a romantic color palette.
Start with a solid base color. Once dry, use nail tape to create sharp lines, filling in with additional contrasting colors. Mixing matte and glossy finishes can give this design a modern twist, ensuring it stands out.
Outfit Pieces:
– Solid base color nail polish (your choice)
– Nail tape (for creating lines)
– Contrasting color polishes (for filling)
– Top coat (for durability)
Styling Tips:
– This design is adaptable for both casual and formal settings, making it perfect for any Valentine’s Day celebration.
– Use a matte top coat on some shapes and a glossy one on others for eye-catching contrast.
Ideal for those who want to showcase their modern style. You can easily switch colors for a fresh take!
How To Choose the Perfect Valentine’s Day Nail Designs
Choosing the right Valentine’s Day nail designs can transform your look and boost your confidence. With so many styles and trends to consider, it’s essential to know what to look for. Here are some key factors to help you select the ideal nail art for your special day.
1. Style Preference
Before anything else, think about your personal style. Do you prefer something classic or modern? Romantic or edgy? If you love vintage looks, designs like vintage lace or floral fantasy may appeal to you. On the other hand, if you’re into trendy aesthetics, opt for geometric patterns or artistic brush strokes. Make sure your choice reflects who you are and what makes you feel good.
2. Color Palette
Colors play a significant role in nail design. For Valentine’s Day, shades of red, pink, and white are traditional favorites. However, you can also explore jewel tones or pastels for a fresh twist. Consider your outfit and the overall vibe you want to convey. Mixing and matching colors can also create a unique look. For example, combining soft pinks with bold reds can add depth to your nail art.
3. Nail Length and Shape
Your nail length and shape can influence your design choices. Long nails can handle intricate designs such as hearts and bows, while shorter nails may benefit from minimalist styles like dots or stripes. If you have square-shaped nails, a chic marble effect can be stunning. Round nails may look adorable with whimsical animal prints. Choose a design that complements your natural nail shape.
4. Occasion and Setting
Think about where you’ll be showing off your nails. If you’re going out for a casual dinner, playful designs like neon love or candy hearts might fit perfectly. For a more formal event, consider elegant styles like jewel-toned elegance or romantic sparkles. The setting can help you narrow down your options and ensure your nails suit the occasion.
5. Skill Level for DIY
If you plan to do your nails yourself, assess your skill level. Some designs, like glitter gradients or sweet candy hearts, are easier to achieve than intricate lace patterns or cosmic love. If you’re a beginner, start with simpler designs and gradually move to more complex ones. You can always seek professional help if you want something more elaborate.
6. Nail Care and Maintenance
Lastly, consider how much time you’re willing to spend on nail maintenance. Some designs, like sparkly accent nails, may require more upkeep than others. If you have a busy schedule, opt for less intricate styles that last longer. For instance, a classic French twist or minimalist hearts can look chic with less maintenance.
Pro Tip: Take a photo of your favorite nail designs to show your nail artist or keep handy while doing your nails. This will help you communicate your vision clearly and ensure you get the look you desire.
Choosing the right Valentine’s Day nail designs can enhance your overall look and make you feel special. By considering your style preference, color palette, nail length, occasion, skill level, and maintenance needs, you can find the perfect design that will truly steal the show this year!
Modern Geometric
Editor’s Choice

32 Colors Nail Striping Tape for Nail Art 1mm Self Adhesive Nail Stripin…

JODSONE Gel Nail Polish Kit with U V Light 32 Colors Gel Polish Nail + 4…

Beetles 2 Pcs 15ml No Wipe Gel Top Coat and Base Coat Set – Shine Finish…
9. Vintage Lace

For a romantic touch, the Vintage Lace design captures classic elegance. This nail art mimics delicate lace patterns, making it a stunning choice for Valentine’s Day.
Start with a nude or light pink base to give the lace more impact. Once dry, use a fine brush or lace stamping plate to create intricate lace designs on your nails. Adorn this style with tiny rhinestones for added glamour.
Outfit Pieces:
– Nude or light pink polish (for the base)
– Lace stamping plate or fine brush (for details)
– Tiny rhinestones (for embellishment)
– Top coat (to seal the design)
Styling Tips:
– Lace designs can beautifully pair with any outfit, making them suitable for various occasions.
– Apply a base coat to protect your nails from staining, especially with darker colors.
Perfect for formal events, weddings, or any romantic occasion. You can customize the lace patterns to match your outfit!
Vintage Lace
Editor’s Choice
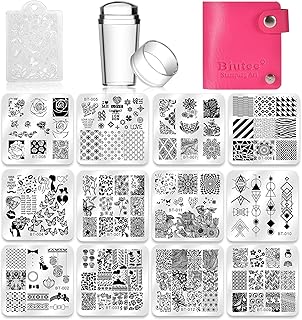
Biutee Nail Stamping Plates Set 12pcs Nail Plates 1stamper 1scraper 1sto…

FANDAMEI Nail Charms, Nail Rhinestones Kit with 8 Boxes of Nail Gems, 3D…
Morovan Rose Nail Polish Set: Fall Burgundy Dark Wine Cherry Red Hot Pin…
10. Hearts and Stripes

Add a fun twist to your Valentine’s Day nails with the Hearts and Stripes design! This playful combination features alternating stripes and small heart designs, bringing a cheerful vibe to your manicure.
Choose a classic red or pink base coat. Using nail tape, create striped sections on your nails, filling them with contrasting colors. Add tiny hearts between the stripes for the perfect Valentine’s Day touch.
Outfit Pieces:
– Red or pink polish (for the base)
– Nail tape (for creating stripes)
– Contrasting color polishes (for filling)
– Top coat (to protect the design)
Styling Tips:
– Match your nail colors with your outfit for a coordinated look, or mix colors for a playful contrast.
– Let each layer dry completely to avoid smudging for the best results.
Ideal for casual outings, parties, or any festive occasion. You can easily switch colors to fit your style!
Hearts and Stripes
Editor’s Choice
Artdone 38Pcs Nail Striping Tape Lines Kit With Nail Art Pens Dotting To…

Sally Hansen Hard as Nails, Heart of Stone, Long Lasting, Chip Resistant…

16.5ml Red Nail Polish Large Volume Quick Drying Nail Polish, Fast Dryin…
11. Bold Red Ombre

Embrace the classic Valentine’s color with a bold red ombre design that exudes romance and confidence. This look transitions from deep crimson at the base to a lighter red at the tips, creating a striking visual effect.
Start with a white base coat to enhance the vibrancy of the red ombre. Using a makeup sponge, apply the darker shade at the base and blend it with a lighter shade toward the tips. Finish with a glossy top coat for an extra shine.
Outfit Pieces:
– White nail polish (for the base coat)
– Dark red polish (for the base ombre)
– Lighter red polish (for tips)
– Glossy top coat (for shine)
Styling Tips:
– Use a clean sponge for each application to ensure smooth color transitions.
– This eye-catching design is versatile for any Valentine’s celebration, perfect for date nights or casual outings.
Ideal for making bold statements, you can easily switch the red hues for pink or purple for a fresh spin!
Bold Red Ombre
Editor’s Choice

MEFA 42 Colors Gel Nail Polish Kit with U V Light, 50 Pcs All Seasons Co…
200Pack Nail Sponges for Ombre,Professional Ombre Nail Sponge,Soft Aura …

modelones Gel Top Coat, 15ml No Wipe Gel Nail Polish High Gloss Top Coat…
12. Sweet Candy Hearts

Capture the essence of Valentine’s Day with a playful Sweet Candy Hearts design! This vibrant nail art features colorful candy hearts with cute messages, perfect for spreading love and joy.
Select a bright base color, like light pink or white. Once dry, use a thin brush or dotting tool to paint tiny candy hearts with classic messages like ‘Be Mine’ and ‘Love You.’ Mix up colors to create a vibrant assortment that catches the eye!
Outfit Pieces:
– Light pink or white polish (for the base)
– Thin brush or dotting tool (for painting hearts)
– Top coat (for durability)
Styling Tips:
– Ensure your nails are completely dry before applying the top coat to avoid smudging.
– This fun design embodies nostalgia, making it a delightful choice for playful nail art.
Perfect for casual gatherings, parties, or any fun Valentine’s celebration. You can customize the messages to make them personal!
You might also like


Sweet Candy Hearts
Editor’s Choice
Morovan 15 Bright Color 0.27oz Air Quick Dry Nail Polish Gift Set for Women
Artdone Nail Dotting Tools 32PCS Double-ended Nail Art Brushes Kit Nail …
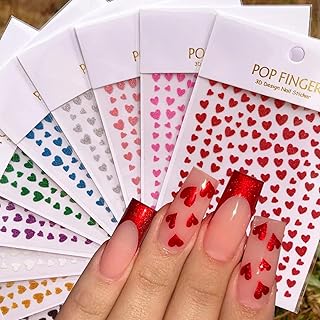
30 Sheets Valentine’s Day Nail Art Stickers Red Heart Nail Decals 3D Sel…
13. Jewel-Toned Elegance

For those who prefer a touch of luxury, the Jewel-Toned Elegance design is a stunning choice. This look features deep jewel colors like emerald green, sapphire blue, and rich burgundy that radiate sophistication and glamour.
Start with a base coat and apply one or two coats of your chosen jewel tone. Consider adding subtle metallic accents or nail art to enhance the luxurious vibe. This design embodies elegance, making it perfect for formal Valentine’s occasions or elegant dinner dates.
Outfit Pieces:
– Jewel-toned polish (emerald, sapphire, burgundy)
– Metallic accents (optional for added flair)
– Top coat (for a polished finish)
Styling Tips:
– Pair this design with elegant jewelry to enhance the overall look.
– The rich colors and shiny finish make this a staple for anyone wanting to make a statement.
Perfect for upscale events or romantic evenings. You can customize the jewel tones to match your outfit!
Jewel-Toned Elegance
Editor’s Choice

Seche Vite Dry Fast Top Coat Nail Polish – Quick Dry, Long Lasting, Clea…
L.A. COLORS Color Craze Nail Polish, Jewel Tone CNP447
Artdone Nail Dotting Tools 32PCS Double-ended Nail Art Brushes Kit Nail …
14. Dots and Bows

Mix playful elements with classy touches using the Dots and Bows design! This adorable nail art features polka dots paired with tiny bow designs, creating a sweet and charming aesthetic.
Start with a soft pastel base color like lavender or mint. Once it’s dry, use a dotting tool to create polka dots and a fine brush to paint tiny bows. This design captures a cute vibe while maintaining sophistication.
Outfit Pieces:
– Soft pastel nail polish (lavender or mint)
– Dotting tool (for creating dots)
– Fine brush (for painting bows)
– Top coat (for protection)
Styling Tips:
– Let each layer dry completely for the best results.
– This design is suitable for casual outings or more formal events, making it versatile!
Perfect for brunches, casual dates, or any fun gathering. You can easily switch up the colors to match your mood!
Dots and Bows
Editor’s Choice
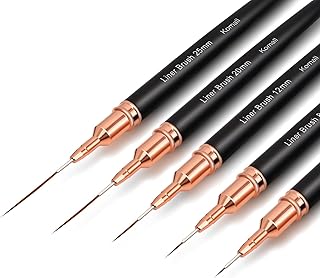
Metallic Nail Art Brushes, 5Pcs Liner Brush Set, UV Gel Polish Painting …

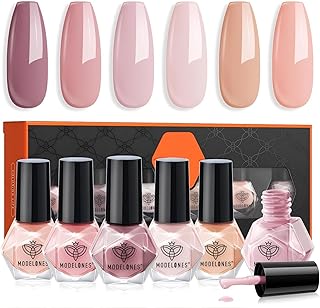
Jelly Nail Polish Set 6 Colors White Pale Red Soft Pink Natural Nude Pal…

10 Pcs Nail Dotting Tools Set, 5 Pcs Double-headed Nail Dotting Pens 5 P…
15. Sparkly Accent Nails

For those who want to keep it simple yet eye-catching, the Sparkly Accent Nails design is perfect. This look features a solid color on most nails, with a sparkly accent nail to add a fun twist.
Choose a classic red or deep pink base color, and select a glittery shade for one or two accent nails. The contrast between the solid and sparkly nails creates a chic appearance, making it versatile for any occasion.
Outfit Pieces:
– Solid color polish (red or deep pink)
– Glitter polish (for accent nails)
– Top coat (for lasting shine)
Styling Tips:
– Use a glitter polish that complements your base color for a cohesive look.
– This simple design has a significant visual impact, perfect for those with a busy schedule!
Ideal for casual outings, parties, or any festive occasion. You can easily switch the base and glitter colors for a fresh look!
Sparkly Accent Nails
Editor’s Choice
Artdone Nail Dotting Tools 32PCS Double-ended Nail Art Brushes Kit Nail …
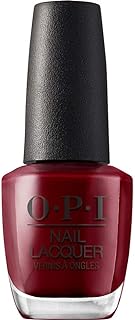
OPI Nail Lacquer Classic Nail Polish Colors | Red Shades | Crème, Shimm…

Morovan Glitter Nail Polish Set: Quick Dry Nail Polish Kit Sparkle Gold …
16. Glitter Gradient

The Glitter Gradient design adds a dazzling effect to your nails, ideal for those who love sparkle! This look features a stunning transition from glitter at the tips to a solid color at the base, creating a beautiful ombre effect.
Start with your chosen base color, and once dry, apply glitter polish at the tips, gradually blending it down toward the base. The combination of glitz and color ensures a perfect balance that’s festive yet stylish.
Outfit Pieces:
– Base color polish (your choice)
– Glitter polish (for the gradient effect)
– Top coat (for a shiny finish)
Styling Tips:
– Ensure each layer is dry to prevent smudging, achieving a flawless look.
– This design is perfect for parties and celebrations, becoming a go-to choice for festive occasions!
Ideal for celebrating special moments or nights out. You can mix colors for the base and glitter to customize your style!
Glitter Gradient
Editor’s Choice
Artdone Nail Dotting Tools 32PCS Double-ended Nail Art Brushes Kit Nail …
Manicure Set Professional Nail Clippers Kit Pedicure Care Tools- Stainle…

FANDAMEI Nail Art Kit, Nail Art Brushes Set, Nail Design Kit Dotting Too…
17. Neon Love

For those who want to stand out, the Neon Love design is a vibrant choice! This look features bright neon colors that scream fun and love, perfect for a bold Valentine’s Day statement.
Select your favorite neon shades, such as hot pink, electric green, and bright orange. Paint your nails in different colors, adding hearts or love symbols in contrasting shades. The result is a playful, energetic design that brings joy to your Valentine’s festivities!
Outfit Pieces:
– Neon nail polishes (hot pink, electric green, orange)
– Fine brush or dotting tool (for adding symbols)
– Top coat (for lasting shine)
Styling Tips:
– Pair neon nails with simple attire to let them shine as the statement piece.
– This design is perfect for those who love to express their personality through vibrant colors!
Ideal for parties, concerts, or any energetic gathering. You can switch up the neon colors for a different vibe!
Neon Love
Editor’s Choice
Morovan 15 Bright Color 0.27oz Air Quick Dry Nail Polish Gift Set for Women
Artdone Nail Dotting Tools 32PCS Double-ended Nail Art Brushes Kit Nail …
Heart Nail Art Stickers Decals 3D Shiny Glitter Love Hearts Self Adhesiv…
18. Minimalistic Hearts

For those who appreciate simplicity, the Minimalistic Hearts design offers a chic and understated look. This design features small heart accents on a neutral base, creating a delicate and sophisticated appearance.
Start with a nude or soft pink base. Once it’s dry, use a fine brush to paint tiny hearts on one or two nails, keeping the rest simple. This design is perfect for any occasion, transitioning effortlessly from day to night.
Outfit Pieces:
– Nude or soft pink polish (for the base)
– Fine brush (for heart accents)
– Top coat (for protection)
Styling Tips:
– Keep nail art tools clean for precise application.
– This elegant design is versatile, making it suitable for all kinds of events!
Perfect for work, casual outings, or evening events. You can easily switch the heart colors to match your outfit!
Minimalistic Hearts
Editor’s Choice

Sally Hansen Insta-Dri®, Dries Instantly Top Coat, Quick Dry, Long Last…

OPI Nail Lacquer Classic Nail Polish Colors | Nude & Brown Shades | Crè…
Artdone Nail Dotting Tools 32PCS Double-ended Nail Art Brushes Kit Nail …
19. Artistic Brush Strokes

Let your artistic side shine with the Artistic Brush Strokes design! This look features strokes of vibrant colors across a neutral base, crafting an expressive and unique nail art style.
Start with a nude base coat, then use a fine brush to create random strokes in various colors. The randomness of the strokes adds personality to your nails, allowing for a creative expression that celebrates love.
Outfit Pieces:
– Nude nail polish (for the base)
– Vibrant polishes (for the brush strokes)
– Top coat (to seal the artwork)
Styling Tips:
– Ensure your brush is clean for each color to maintain clarity in designs.
– This design is perfect for those who want to express their artistic flair!
Ideal for creative events, casual outings, or any occasion where you want to stand out. You can adjust the stroke colors to fit your outfit!
Artistic Brush Strokes
Editor’s Choice
Morovan 15 Bright Color 0.27oz Air Quick Dry Nail Polish Gift Set for Women

Nail Art Tools 27Pcs Set,Nail Art Brush,Resin Nail Art Palette,5 Pcs Nai…
modelones Nail Polish Set 6 Colors Neutral Nude Pink Fall Winter Quick D…
20. Classic French Twist

Elevate the traditional French manicure with a fun twist! The Classic French Twist design features classic white tips while adding a pop of color to the base or tips for a playful yet sophisticated look.
Start with a nude base and apply a classic white tip. Choose a vibrant color for the tips or even opt for glitter to make it sparkle! This modern take on a classic design is perfect for any occasion.
Outfit Pieces:
– Nude nail polish (for the base)
– White polish (for the tips)
– Color or glitter polish (for a twist)
– Top coat (for a polished finish)
Styling Tips:
– Use nail tape for clean lines when creating tips.
– This design is versatile, transitioning effortlessly from day to night!
Ideal for work, dates, or any festive occasion. You can easily switch the tip colors to match your style!
Classic French Twist
Editor’s Choice
L.A. COLORS Color Craze Nail Polish, Glitter Bomb CNP543
Sally Hansen Double Duty™, Base and Top Coat, Quick Dry, Long Lasting,…

AZUREBEAUTY Warm White Nail Polish – Quick Dry, Long-Lasting, Natural …
21. Romantic Sparkles

Bring a bit of magic to your nails with the Romantic Sparkles design! This enchanting look combines soft hues with sparkling glitter accents, perfect for capturing the essence of Valentine’s Day.
Start with a pastel base color, such as light pink or lavender. Apply a coat of glitter at the tips or across the nails for a whimsical effect. This design is sweet and eye-catching, making it ideal for romantic evenings.
Outfit Pieces:
– Pastel nail polish (light pink or lavender)
– Glitter polish (for tips or full coverage)
– Top coat (for a polished look)
Styling Tips:
– Use a non-acetone remover to preserve the glitter for longer wear.
– This design creates an ethereal look that’s sure to make your nails shine bright!
Perfect for date nights, parties, or any romantic celebration. You can customize the glitter color to fit your vibe!
22. Cosmic Love

Take your Valentine’s Day nail game to the next level with the Cosmic Love design! This celestial-themed nail art features deep blues, purples, and sparkly stars, perfect for those who love a touch of the extraordinary.
Begin with a dark base color, and use a sponge to create a galaxy effect with lighter shades. Add tiny stars or heart shapes using a fine brush to complete this cosmic look. It’s an ideal design for those wanting something unique and out of this world!
Outfit Pieces:
– Dark nail polish (for the base)
– Lighter shades (for galaxy effect)
– Fine brush (for stars and hearts)
– Top coat (for shine)
Styling Tips:
– Allow each layer to dry completely for the best results.
– This design is perfect for those who want to express their love in a cosmic way!
Perfect for stargazing events or any whimsical gathering. You can adjust the colors to match your personal style!
You Might Also Like


23. Shimmering Pastels

Soft and serene, the Shimmering Pastels design is a perfect choice for those who prefer subtle yet captivating nail art. This look features a palette of soft pastel colors with a hint of shimmer, creating a delicate and romantic aesthetic.
Start with a base coat and apply light pastel shades like baby pink, mint green, or lavender. Add a shimmering top coat to give your nails a magical touch. This design is not only pretty but also versatile enough for day-to-night transitions.
Outfit Pieces:
– Soft pastel nail polishes (baby pink, mint, lavender)
– Shimmering top coat (for sparkle)
– Clear top coat (for added shine)
Styling Tips:
– Ensure each coat is dry before applying the next for a smooth finish.
– The gentle colors and shimmer create an ethereal look perfect for celebrating love!
Ideal for romantic dinners, brunches, or any daytime event. You can experiment with different pastel shades to fit your style!
24. Artistic Splatter

Get creative with the Artistic Splatter design that introduces a fun, abstract touch to your nails. This art-inspired look features splatters of vibrant colors, perfect for those who love to express their personality through their nail art.
Start with a white or nude base coat, and use a brush to flick or splatter various bright colors across your nails. This design allows for complete freedom and creativity, embodying a joyful spirit, perfect for Valentine’s Day celebrations.
Outfit Pieces:
– White or nude nail polish (for the base)
– Bright polishes (for splattering)
– Top coat (to seal the design)
Styling Tips:
– Use an old toothbrush for splattering for more control!
– This design is a fun project to do with friends, making it interactive and memorable.
Ideal for casual gatherings, parties, or any fun event. You can customize the splatter colors to your liking!
25. Neon Hearts

Light up your Valentine’s Day with Neon Hearts, a nail design that combines bold neon colors and heart motifs for a festive look! This design is perfect for anyone wanting to express their love vibrantly.
Choose your favorite neon shades and start with a base color. Paint hearts in a contrasting neon color using a fine brush or dotting tool. The bright colors will surely catch everyone’s attention, making it a playful choice for your Valentine’s celebrations.
Outfit Pieces:
– Neon nail polishes (your choice)
– Fine brush or dotting tool (for hearts)
– Top coat (for a glossy finish)
Styling Tips:
– Neon colors look best under natural light, enhancing their vibrancy!
– You can mix and match colors for a unique touch that stands out.
Perfect for parties, festivals, or any lively gathering. You can switch up the heart motifs for added creativity!
26. Earthy Tones

For a more grounded approach, the Earthy Tones design features warm, muted colors that reflect nature’s beauty. This look is perfect for those who prefer a simple yet elegant style, suitable for any occasion.
Start with neutral base shades like taupe or soft browns, and add accents with earthy greens or rust colors. This design evokes feelings of warmth and comfort, making it a lovely choice for a cozy Valentine’s Day.
Outfit Pieces:
– Neutral base color polishes (taupe or soft brown)
– Earthy accent polishes (greens or rust)
– Top coat (for a polished look)
Styling Tips:
– Keep your nails moisturized to maintain a healthy look.
– This subtle color palette complements various skin tones, making it versatile for all!
Ideal for casual outings, work, or any cozy event. You can easily switch the accent colors to match your outfit!
27. Colorful Foil Designs

Add a touch of glamour with Colorful Foil Designs that bring a luxe feel to your nails. This design incorporates metallic foil accents that catch the light beautifully, making your manicure shine.
Choose a base color of your choice and apply foil in various patterns on one or two accent nails. This method is perfect for those who want to add a bit of bling without going overboard.
Outfit Pieces:
– Base color polish (your choice)
– Nail glue (for applying foil)
– Metallic foil (for accents)
– Top coat (to seal the design)
Styling Tips:
– Allow the base color to dry completely before applying glue for best results.
– The reflective properties of foil contrast beautifully with solid colors, providing a sophisticated look.
Ideal for upscale events or any occasion where you want to shine. You can easily switch the foil colors to match your outfit!
28. Pastel Metallic Mix

For a fresh take on Valentine’s nails, consider the Pastel Metallic Mix design! This look fuses soft pastel colors with shiny metallic elements for a modern and stylish manicure.
Start with a pastel base of lavender, mint, or baby blue, then add metallic accents or stripes for contrast. The combination of soft and shiny elements gives you a chic look that is perfect for any Valentine’s Day outing.
Outfit Pieces:
– Pastel color polishes (lavender, mint, baby blue)
– Metallic polishes (for accents)
– Top coat (for shine)
Styling Tips:
– Use tape for clean lines when adding metallic designs.
– The mix of matte pastels with metallic accents creates a playful vibe, perfect for expressing your style!
Ideal for brunches, parties, or any festive gathering. You can easily switch up the pastel shades to match your outfit!
29. Whimsical Animal Prints

For the adventurous spirit, the Whimsical Animal Prints design features playful animal-inspired patterns with a Valentine’s twist. This fun nail art incorporates heart shapes and vibrant colors to celebrate both love and creativity.
Choose a fun base color and use nail art brushes to create playful animal prints, such as tiger stripes or leopard spots, intermixed with hearts. This design is perfect for showcasing your personality in a fun way!
Outfit Pieces:
– Base color polish (your choice)
– Nail art brushes (for designs)
– Top coat (for durability)
Styling Tips:
– Ensure you have a steady hand for intricate designs!
– This design is a fun project to do with friends, making it interactive and enjoyable.
Ideal for casual outings, parties, or any fun event. You can easily switch up the animal prints to reflect your style!
30. Romantic Reflection

End your Valentine’s Day manicure journey with the Romantic Reflection design, which brings together the beauty of duality. This design features mirrored effects or reflective foil that symbolizes the connection between lovers.
Choose a base color that suits your style and add reflective accents that shine in the light, creating a captivating look. This design is perfect for those who want to express their romantic side in a unique way.
Outfit Pieces:
– Base color polish (your choice)
– Reflective accents (foil or polish)
– Top coat (for a polished look)
Styling Tips:
– Use a clear top coat to enhance the reflection and ensure durability.
– The reflective elements represent love’s complexity, making it an artistic choice for any celebration!
Perfect for romantic dinners, special occasions, or any event where you want to shine. You can customize the reflective elements to fit your style!
Conclusion

With these 30 gorgeous Valentine’s Day nail designs, you’re sure to find inspiration that suits your style for this love-filled season. Whether you prefer chic elegance, playful patterns, or sparkling accents, there’s a design here that will steal the show.
Don’t hesitate to mix and match elements from different designs, creating something uniquely yours. Embrace your creativity, express your love, and have fun experimenting with nail art this Valentine’s Day!
Note: We aim to provide accurate product links, but some may occasionally expire or become unavailable. If this happens, please search directly on Amazon for the product or a suitable alternative.
This post contains Amazon affiliate links, meaning we may earn a small commission if you purchase through our links, at no extra cost to you.
Related Topics
Valentine's Day nails
nail art
trendy designs
gorgeous nail art
easy nail designs
romantic themes
cute nail ideas
festive nail art
beginner friendly
valentine nail trends
nail design inspiration
seasonal nails


![[Snowy & Timer] 6 Ft Prelit Christmas Garland, Real Touch Cedar Garland ...](https://m.media-amazon.com/images/I/811MxndBu8L._AC_UL320_.jpg)


![Energy Healing [All in 1]: 345 Techniques & Strategies to Unlock Cosmic ...](https://m.media-amazon.com/images/I/61G6eQNTaUL._AC_UL640_QL65_.jpg)